How to read the damage numbers on the aim line, use test shots, pick from the 24 parts and five sockets, handle each brick type and spend bolts in the workshop in Frame Breaker.
Frame Breaker is a one-thumb brick breaker roguelite. In most games of this kind you make the ball stronger. Here you upgrade the board. Walls, ceiling, floor, corners and the launcher each have sockets, and you bolt parts into them one at a time.
The JWorld team wrote this guide from the game's own data and on-screen text. It covers how to read the aim line, which parts to pick first, how to treat each brick type and what to buy in the workshop.
How one turn works
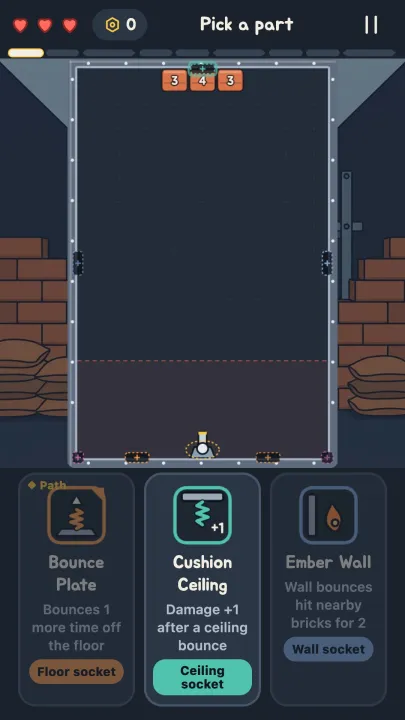
A run has 9 stages, and stages 3, 6 and 9 are bosses. Each turn has four steps:
- Press and drag to bring up the aim line. Your finger does not cover it.
- Release and the balls leave one after another. The Steel Ball you start with fires 10.
- When every ball has landed, the bricks move down one row.
- A brick that crosses the red dashed defense line costs you a heart.
You start with 3 hearts and can raise that to a maximum of 5. At 0 the run is over, with no revive. Clear every brick and the stage ends, then Pick a part opens and you choose one of three cards.
One detail matters for planning: the spot where your first ball lands becomes the launcher's next position. So this shot also decides your angle options next turn.
The numbers on the aim line are the whole game
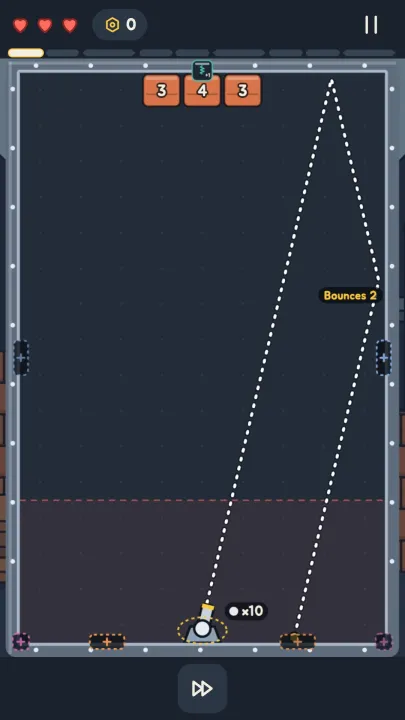
The aim line marks each bounce with Bounces n, and it draws four bounces by default. When the line touches a brick, a −N damage tag appears next to it. So before you fire, you can see how much this angle takes off that brick.
A few habits make the numbers useful:
- If −N is equal to or larger than a brick's remaining HP, that brick breaks.
- About ten balls follow the same angle. Think of the line as a lane that many balls will travel.
- Clear rows that threaten your hearts first and leave safe rows for later. When the game shows "Next row: up to −n hearts", look at that row first.
If the line feels too short, aim for the Long Aim Line part or the permanent workshop perk Aim line bounce +1. Each extra bounce shows numbers on bricks farther away.
Test shots: preview a whole volley
Test shot is an information part that goes into the launcher socket. You get 2 per stage (4 at Lv2). Aim, press it, and it reports the result of the entire volley as numbers. No ball is actually fired.
| What it shows | Meaning |
|---|---|
| Damage | Total damage of this volley |
| Bricks | How many bricks will break |
| Hearts at risk | Hearts you could lose on the next row |
When you run out, the game says "No test shots left". Watching an ad gives +2 for the current stage, and you can close it safely.
Here is a good order of use. Pick two or three candidate angles from the line alone. Spend a test shot only on boards where hearts are on the line. If you burn them on easy boards, you have none left in front of a boss.
24 parts, five sockets
Parts attach to one of five sockets: Wall, Ceiling, Floor, Corner and Launcher. Pick a card and the part clicks into its socket automatically, with no placement puzzle. Picking the same part again makes it Lv2. Picking a different part for a socket that holds a Lv1 part replaces it.
| Socket | Parts |
|---|---|
| Wall | Spiked Wall, Wrap Wall, Tilted Wall, Mirror Wall, Ember Wall, Buffer Wall |
| Ceiling | Cushion Ceiling, Tack Ceiling, Sloped Ceiling, Bonus Shelf |
| Floor | Bounce Plate, Safety Net, Return Rail, Bolt Floor, Repair Frame |
| Corner | Corner Firework, Corner Mirror, Corner Amp, Corner Vault |
| Launcher | Fan, Helper Launcher, Test Shot, Long Aim Line, Loader |
Cards with a ◆ Path tag change the route the balls fly. Wrap Wall, Tilted Wall, Mirror Wall, Sloped Ceiling, Bounce Plate, Corner Mirror, Fan and Helper Launcher belong here. Whenever possible, at least one of your three cards is a Path part.
Some concrete effects:
- Cushion Ceiling: after a ceiling bounce, that ball does +1 damage (+2 at Lv2).
- Bounce Plate: bounces once more off the floor (25% of balls at Lv1, 50% at Lv2).
- Safety Net: blocks defense-line hits 2 times per stage (3 at Lv2).
- Loader: start balls +1 (+2 at Lv2).
Part order for a first clear
There is no single right answer, but this order keeps you out of trouble:
- First pick: a damage part (Cushion Ceiling, Corner Amp, Spiked Wall) or Loader for more balls.
- Second pick: if hearts start to drain, take Safety Net or Repair Frame. Hearts are hard to get back.
- Midrun: add one Path part so your line reaches more bricks.
- Do not be shy about Lv2: it is a big jump. Once a part is Lv2, its socket is locked, so no later pick overwrites it.
Bonus Shelf, Bolt Floor and Corner Vault are economy parts. They earn bolts, but they do not help break bricks. Skip them on a run where you want the first clear, and take them when you have room.
Eight bricks and three bosses
| Brick | Rule | How to handle it |
|---|---|---|
| Clay | Plain brick | Most common. Nothing special. |
| Hard | Double HP | Choose an angle with high damage and finish it in one volley. |
| Iron Pillar | Cannot be broken, bounces balls | Do not try to break it. Use it as a bumper. It vanishes harmlessly at the defense line. |
| Bomb | Hurts its neighbours when broken | Hit bombs next to other bricks to start chains. |
| Shield | Its top blocks damage | Do not hit from above. Bounce in from the side or below. |
| Split | Splits in two when broken | Break it when there is open space below. |
| Supply | Breaking it gives +1 ball this stage | High priority. The earlier you break it, the more it pays. |
| Runner | Moves two rows per turn | Deal with it first. It drains hearts fastest. |
Bosses have their own rules. The Gate takes triple damage on its weak core. The Revolving Door only takes damage on its open side, so aim there. The Kiln Giant breaks in 3 phases. After a boss, a choice screen opens with boosts such as Balls +n, Damage +n, Hearts +n, Aim line +n, One more part and Bolts +n.
Six starting balls and the workshop
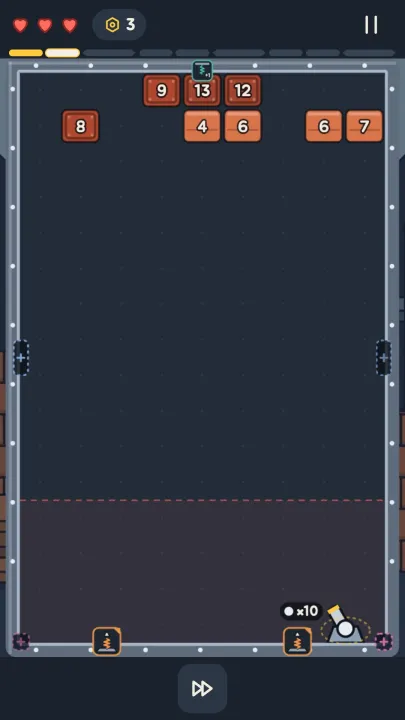
You choose a ball at the start of a run. Three are open from the beginning:
| Ball | Balls / damage | Trait |
|---|---|---|
| Steel Ball | 10 / 1 | Balanced |
| Anvil | 7 / 2 | Big and slower |
| Glass Ball | 9 / 1 | Small and faster |
| Drill | 3 / 1 | Pierces the first brick (100 bolts) |
| Pop | 10 / 1 | Breaking a brick hurts its neighbours (200 bolts) |
| Compass | 9 / 1 | Curves toward the nearest brick (350 bolts) |
After a run you receive bolts: 3 per stage cleared, 6 for each boss and 20 for clearing the whole run. You spend them in the Workshop.
A good buying order:
- Part unlocks: they open in a fixed order, cheapest first: Buffer Wall (40), Repair Frame (50), Helper Launcher (60) and on.
- Permanent perk Start balls +2 (250 bolts): the most visible boost.
- Aim line bounce +1 (150 bolts) and First part: 4 choices (350 bolts): more information and more options.
If you fail two runs in a row, the next run starts with +1 heart. After your first clear, Heat unlocks: tougher bricks and more bolts.
Daily Run
The Daily Run gives everyone the same ball and bricks each day. There are no bolts, only a score, and only your best score for the day is kept. Since the board is identical, the only difference is how you build your frame.
Summary
- The board grows, not the ball: 24 parts in 5 sockets.
- Read −N and Bounces n on the aim line before you pick an angle.
- Save test shots for boards where hearts are at risk.
- First pick a damage part or Loader, then Safety Net to protect hearts.
- Iron Pillar is a bumper, Shield needs a side hit, Runner and Supply go first.
- In the workshop, buy cheap part unlocks and Start balls +2 first.
You can play Frame Breaker on the web right now. Its page is here.
Written by the JWorld team from our game design documents and measured play data, with AI tools helping with the writing.