To earn 3 stars in Harbor Haul you need to know what to place where and when to tap. The ten cargo types, crane timing, how to handle glass, barrels, wedges and wind, and the exact star conditions.
Harbor Haul is a physics puzzle where a harbor crane swings cargo back and forth and you tap once to drop it onto a barge. The crane moves by itself. Your only decisions are when to drop and how to place the crate. The cargo uses real physics, so a bad stack ends in a collapse.
We made the game, and this guide uses its real rules and numbers. It walks through what to look at, in order, to earn 3 stars.
How one contract plays
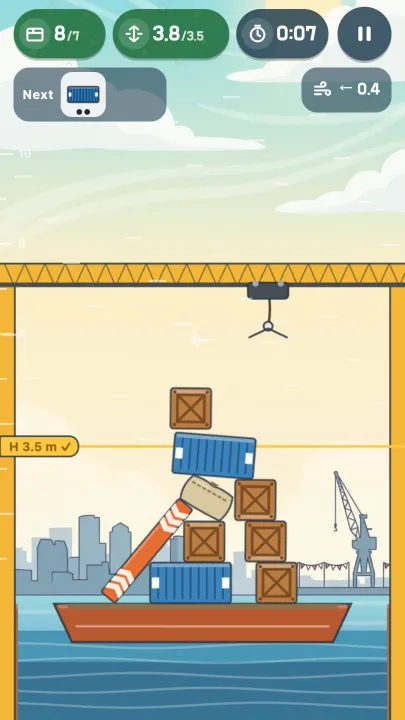
A contract takes roughly 24 to 41 seconds. The flow is simple.
- A crate hangs from the crane.
- The trolley swings left and right along the rail. A dashed line shows where the crate would land if you dropped it right now.
- Tap the screen and the crate falls. The fall takes about 0.4 to 0.5 seconds.
- After the last crate, the game waits for the tower to settle, then counts your stars.
The top-left counter is "crates standing / delivery goal". The middle one is "tower height / height goal". The right one is the clock. Under them, Next shows the next two crates. That preview is the best tool in the game: decide where the current crate goes by looking at what comes after it.
The rotate button sits at the bottom right and turns the crate 90 degrees. It is hidden for crates that look the same when turned. On a computer, Space or a click drops, and R rotates.
The star conditions
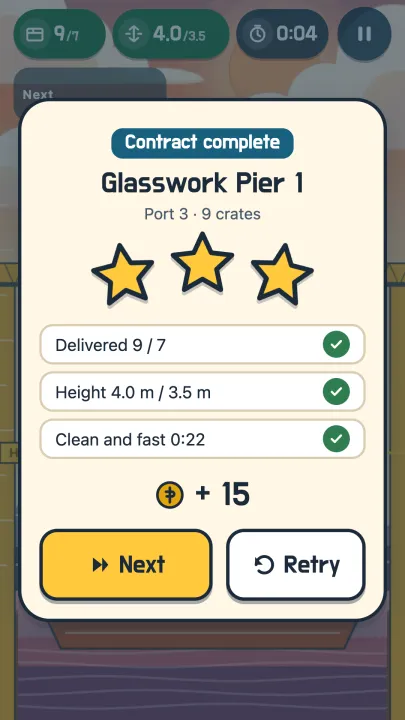
Stars stack. Miss an earlier star and you cannot earn the later ones.
| Stars | Result-card line | Condition |
|---|---|---|
| 1 | Delivered | Standing crates reach the delivery goal. Crates that fell in the water or broke do not count. |
| 2 | Height | Star 1, plus the tower reaches the height goal. |
| 3 | Clean and fast | Star 2, plus zero lost or broken crates, finished within the par time. |
A few things worth knowing:
- Time only affects star 3. A slow run never fails a contract.
- If the game can tell you can no longer reach the goal, it ends right there with Not delivered. Retry starts quickly.
- A contract has between 8 and 16 crates, and the goal only asks for most of them, so one or two mistakes still leave room for star 1.
- Every contract gives up to 3 stars, 120 in all across 40 contracts. Ports open as you collect stars (Port 2 opens at 10).
The ten cargo types
The dots under a crate show its weight: more dots, heavier.
| Cargo | Shape and trait | How to use it |
|---|---|---|
| Small Crate | 0.9 m square, no tricks | The safe piece you can always use. |
| Container | 1.8 × 0.9 m, wide | The best choice for the bottom layer. |
| Beam | 2.7 × 0.4 m, long and thin | You can stand it up, but lying flat as a bridge is safer. |
| Sandbag | High friction, it grips | Great for wedging between unstable layers. |
| Steel Block | The heaviest (three dots) | Shakes the tower and crushes glass. Put it low and central. |
| L-Block | L-shaped, four orientations | Rotate so a flat side faces down. |
| Glass Case | Light and fragile | Breaks on a hard hit. See below. |
| Barrel | Round | Rolls a moment, then locks. See below. |
| Wedge | Right triangle with a slope | Slides if the slope is underneath. |
| Buoy | Very light and bouncy | Catches the wind. Rolls a moment, then locks like the barrel. |
Timing: fast and level in the middle, slow and tilted at the ends
The trolley follows a sine path. It moves fastest through the middle and slows at both ends. The hanging crate tilts a little with the trolley's acceleration. According to the design notes, the tilt is about 8 degrees at the ends and close to zero in the middle.
- Drop in the middle: the crate falls level, but it carries sideways momentum. It keeps roughly 15% of the trolley's speed as it falls.
- Drop near an end: very little sideways drift, but the crate lands tilted.
So don't trust the dashed line alone. Watch which way the crate is travelling as well. Treat the first few contracts as practice in placing things cleanly. The swing period shortens as you move up the ports: Port 1 starts at 5.0 seconds, Port 5 starts at 3.4 and ends under 3. Your eye adjusts to the speed.
Five stacking rules
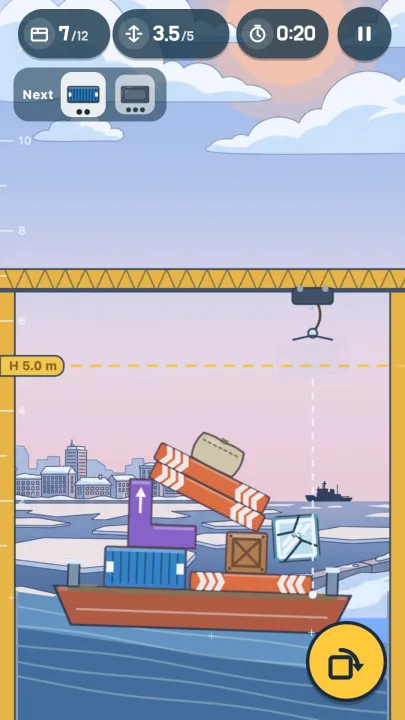
- Wide pieces go low. Lay a flat floor of Containers and Small Crates. A narrow base collapses no matter how well you place the rest.
- Heavy early. The higher a Steel Block sits, the harder it shakes the tower.
- Keep the centre of mass in the middle. A stack that sticks out leans that way, so plan the next crate to land on the other side.
- Use the next two crates. If a Beam is coming, it needs a wide place to rest. The preview tells you, so keep that spot free.
- Think about height last. Height goals scale with the number of crates. Stack flat first and use the remaining crates to reach the goal.
The first contracts also show a few one-time hints, drawn as icons rather than text.
Handling the dangerous cargo
Glass Case. It breaks only on impact. Slow wobbling is fine. Dropping anything onto glass breaks it almost every time. The glass itself is lowered gently by the crane, so placing it is safe. The rule is one line: never put anything on glass. Place it last if you can, or alone where nothing will touch it. A broken case counts as lost, so you lose star 3.
Barrel and Buoy. These roll for a very short moment, then lock and sit like a flat crate. By design, a barrel whose centre lands at least 0.4 m inside the deck edge will not roll off on its own. Do not aim at the edge; drop well inside. In the ports that use them, a safety hatch along the edge shows until the first barrel has locked.
Wedge. The slope is the problem. Put the flat side down, or load another crate onto the slope so it cannot slide. Dropping a wedge last avoids most trouble.
Wind. Wind pushes only crates that are falling, never the ones already stacked. The arrow and number at the top right show direction and strength, and light crates are pushed more. The Buoy is the most affected, the Steel Block barely moves. If the wind blows right, release a little left of the dashed line.
One new rule in every port
| Port | New rule | Tip |
|---|---|---|
| 1 Calm Cove | None. Learn tapping and rotating. | Crates are generous, so focus on stacking flat. |
| 2 Windward Wharf | Wind pushes falling cargo. | Read the arrow and release upwind of the line. |
| 3 Glasswork Pier | Glass Cases appear, with barrels from contract 4. | Glass last, barrels inside. |
| 4 Floe Harbor | The deck is slippery and tilted. | Low rims on the ends catch sliding cargo. Let crates stop against them. |
| 5 Storm Gantry | The barge rocks on a swell. | Drop as the dot heads for a green end. |
The dot bar in Port 5 shows the swell's five-second rhythm. The period is identical in every contract and never speeds up, so you only need to learn the beat.
What coins buy
Coins come from new stars and from clearing contracts. There are five upgrades.
| Name | Effect |
|---|---|
| Damper Hook | Less carry and tilt on release (3 levels). |
| Slow Trolley | The trolley is 5% slower per level (3 levels). |
| Landing Marker | Shows where the crate will land as a dot. |
| Grippy Deck | Deck grip +0.1 per level (2 levels). |
| Spare Slot | +1 Small Crate in every contract. |
If you are stuck, Slow Trolley and Landing Marker are the most noticeable. Still, upgrades do not earn stars for you. Fix your stacking order first, then spend.
Summary
- The crane moves on its own. Your decisions are when to tap and how to place.
- Stars stack: Delivered, then Height, then Clean and fast.
- Time only affects star 3, and one or two mistakes still leave star 1 within reach.
- Wide cargo low, Steel Block early, nothing on top of glass.
- Barrels and buoys roll a moment and lock; drop them well inside the edge.
- Wind pushes only falling crates, so aim against the arrow.
- Always check the preview of the next two crates.
You can play Harbor Haul in your browser. The game page is at /en/apps/crane/.
Written by the JWorld team from our game design documents and measured play data, with AI tools helping with the writing.