How to survive the full 10 minutes: when to move, when to stand still, how evolution pairs work, and when bosses and chests arrive, using the in-game names.
Dokkaebi Night Parade is a 10-minute survival game. You only steer; your weapons attack on their own. Most players start by running in circles and hoping, but the main rule of the game points the other way. Standing still makes you stronger.
The JWorld team wrote this guide from the in-game help text and the game's data tables. It covers the ward numbers, the evolution rules and the boss timetable. Everything here describes the version that is live today, on the first map, Dokkaebi Pass.
Move to survive, stop to burn: the ward
Press and drag to move. Let go and you stop. If you stay put, a golden ward charges around your feet. The in-game help says it plainly: when full, you deal 50% more damage and nearby ghosts slow down. Moving drains it fast.
Here are the numbers.
| Detail | Value |
|---|---|
| Delay before charging starts | 0.25 s |
| Time from empty to full | 1.4 s |
| Full ward | +50% damage, ghosts inside slowed by 40% |
| When you move | Drains 3 points per second, so even a full ward is gone in about 0.3 s |
So from the moment you stop, a ward takes about 1.65 seconds to complete. That feels short, but it feels long when ghosts are closing in. The trick is to stop when the space around you is empty, not when you are already surrounded.
The ward is more than a ring. When it is full, "Ward ready!" appears, ghosts inside slow down, and gems are pulled toward you. If ghosts are already touching you, though, give up the ward and walk away. A drained ward costs you 1.65 seconds; a lost fight costs you the run.
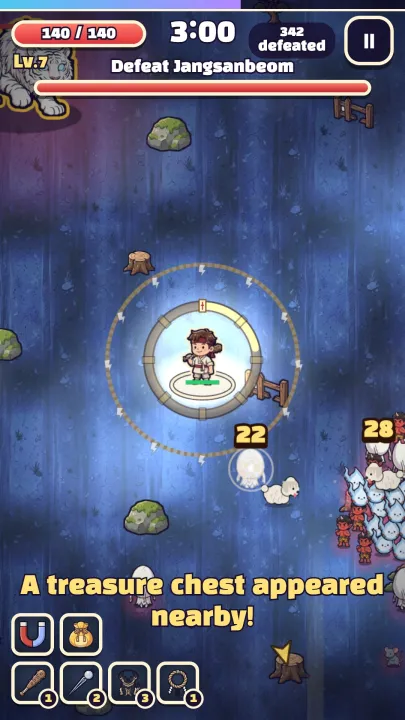
In this screenshot the ward is still charging: the ring and arc around the hero show how full it is. The ghosts are gathered on the right, so the empty left side is the better place to stop.
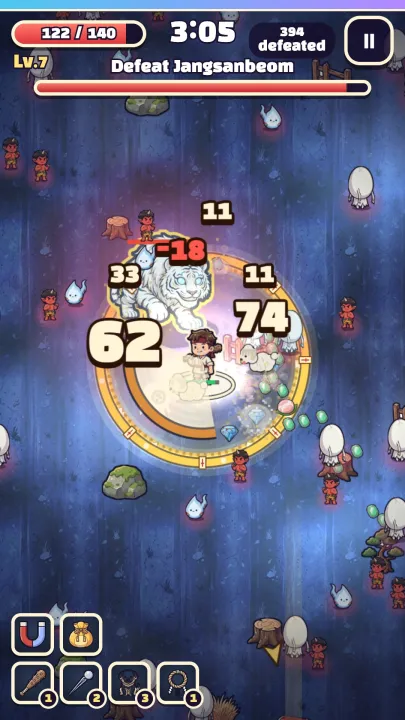
Once the ring turns solid gold, the damage numbers jump. Jangsanbeom walked into this one, and the gems on the right are being pulled toward the hero.
A practice routine for the first runs
Try this over your first few runs.
- In the quiet first minute, stop two or three times on purpose. You are training your feel for how the ward charges.
- When the ward is full, stay and burn. Move only when gems are near enough to grab.
- When ghosts bunch up close, drop the ward and leave in a wide arc.
There are also achievements worth knowing about. "Twenty Wards" asks you to fill your ward 20 times in one run. "Ward Master" asks you to defeat 300 ghosts with a full ward in one run. And there is one that goes the other way: survive 5 minutes without ever filling the ward. The game lets both styles count.
Level-ups and picking skills
Collect the gems ghosts drop and you level up. Each time you pick one of three or four cards. You can hold 4 weapons and 4 skills, and both top out at level 5.
Note that the card gives you more than a name. On a weapon card, a line such as "Evolves with Might" tells you which skill pairs with it. Get that weapon to level 5 while holding the partner skill and it can evolve.
Three skills improve the ward directly.
| Skill | Effect (per level) |
|---|---|
| Focus | Ward charges 15% faster |
| Seal | Ward range +10% |
| Composure | Ward fades more slowly |
Focus at level 5 makes the ward charge 75% faster, which cuts the 1.4 seconds to about 0.8. Composure slows the drain, so more of your ward survives while you walk.
Weapons and their evolution partners
The cards print the partner, so you do not need to memorize anything. Knowing it early still helps you plan a build. These are the common pairs.
| Weapon | Partner skill | Evolves into |
|---|---|---|
| Dokkaebi Club | Might | Golden Wish Club |
| Talisman | Haste | Heavenly Talisman |
| Taegeuk Circle | Reach | Yin-Yang Circle |
| Fox Beads | Swiftness | Dragon Pearls |
| Divine Bow | Vitality | Jumong's Bow |
| Sotdae Totem | Focus | Sky Sotdae |
| Moktak | Haste | Temple Bell |
| Taegeuk Fan | Swiftness | Plantain Fan |
Three of these, the Sotdae Totem, Moktak and Taegeuk Fan, were built around the stop-and-go rhythm. From the in-game descriptions:
- Sotdae Totem: when your ward fills, a sotdae rises at your feet and shoots ghosts. You can leave and it keeps working.
- Taegeuk Fan: step out of your ward to blow a gust at ghosts. It hits harder from a full ward.
- Moktak: a pulse weapon that rewards standing in a charged ward, so it suits a patient style.
The Taegeuk Circle constantly damages everything around you, and its evolution, the Yin-Yang Circle, slows and scorches ghosts inside it. Paired with the ward, the inside of your ring becomes a furnace. With only 4 weapon slots, one ward weapon plus one that hits from range is a sensible mix.
Evolution happens at a chest
Once a weapon is level 5 and you hold its partner, you need a treasure chest. On Dokkaebi Pass they come at these moments:
- About 2:25: the first chest appears.
- 6:00: defeating the Gumiho brings a chest.
- 8:00: another chest, your last evolution chance before the Grim Reaper.
When a chest is close, "A treasure chest appeared nearby!" shows up. Check first that you hold a level 5 weapon with its partner. If so, "Ready to evolve!" appears, and opening the chest evolves it.
If two evolved weapons are partners, opening a chest can fuse them into one union. Both keep working, you gain 30% damage, and one weapon slot frees up. It is a strong late-game move.
Bosses and danger windows
Here is the Dokkaebi Pass timetable.
| Time | What happens |
|---|---|
| 1:30 | 28 rats close in from every side |
| 1:40 | 24 little dokkaebi close in from every side |
| 2:20 | 2 egg ghosts (elites) |
| 3:00 | Jangsanbeom: charges and calls rat swarms |
| 4:30 | 36 wisps close in from every side |
| 6:00 | Gumiho: foxfire, calls foxes |
| 7:30 | 24 egg ghosts close in from every side |
| 8:30 | 48 rats close in from every side |
| 10:00 | Grim Reaper |
Bosses speed up once they fall below half health. If Jangsanbeom charges, stepping wide to the side is safer than tanking it in the ward. When a swarm closes in from every side, as in the table, drop the ward and break through one side.
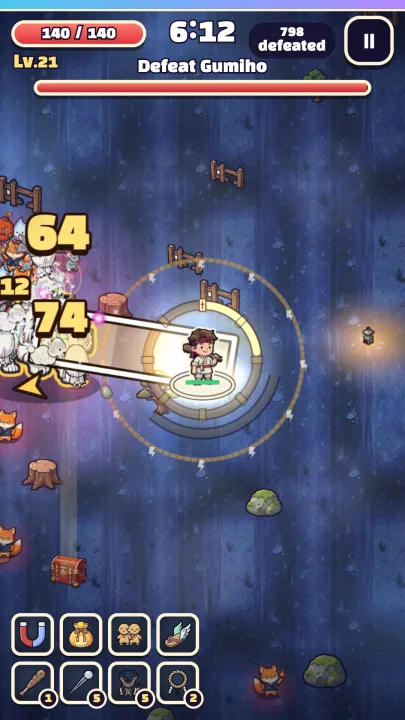
Defeat the Grim Reaper to win. Beating the Gumiho once opens a new map, the Road to the Underworld, and beating the Imugi there opens the Dokkaebi Market.
Summary
- Move to collect, stop to burn. The ward takes about 1.65 seconds to complete.
- A full ward gives +50% damage and slows ghosts by 40%. Moving drains it almost at once.
- You hold 4 weapons and 4 skills. Read the "Evolves with" line on each card.
- Level 5 weapon + partner skill + treasure chest = evolution. Chests come at about 2:25, 6:00 and 8:00.
- Bosses: Jangsanbeom at 3:00, Gumiho at 6:00, Grim Reaper at 10:00.
- Sotdae Totem, Moktak and Taegeuk Fan are the weapons that fit the stop-and-go rhythm.
Ready to try it? Play Dokkaebi Night Parade on the web, or read the game page.
Written by the JWorld team from our game design documents and measured play data, with AI tools helping with the writing.